
Importing Points with Labels from CSV
Dieser Inhalt ist noch nicht in deiner Sprache verfügbar.
Introduction
Section titled “Introduction”QCAD offers a powerful tool to import point data with labels from CSV files. CSV files are simple text based spreadsheet files. CSV stands for “comma-separated values”.
This tool can be accessed from menu Misc > Import/Export > Import Points with Labels.
Example Data
Section titled “Example Data”For this tutorial, we use the following table as example data:
| N | X | Y | Z | C |
|---|---|---|---|---|
| P1 | 127.6 | 100.5 | 50 | Location A |
| P2 | 120 | 134 | 48.77 | Location B |
| P3 | 125 | 123.5 | 37.6 | Location C |
| P4 | 175 | 80.75 | 12.6 | Location D |
The raw contents of the CSV file looks like this:
N,X,Y,Z,CP1,127.6,100.5,50,Location AP2,120,134,48.77,Location BP3,125,123.5,37.6,Location CP4,175,80.75,12.6,Location DPreparation
Section titled “Preparation”Before importing points, make sure that the active layer of your drawing is the layer on which you want the points to be.
Prepare all layers you will need for the imported labels if you are planning to put the labels on separate layers.
Example 1: Points with a Single Label
Section titled “Example 1: Points with a Single Label”For this first example, we want to import all points in the table with columns X and Y as point coordinates. Column ‘N’ will be used as a label at the right side beside each point. Each row in the table is imported as a point entity and a text entity as shown here:

After starting the tool from menu Misc > Import/Export > Import Points with Labels, you first have to choose which CSV file you want to import.
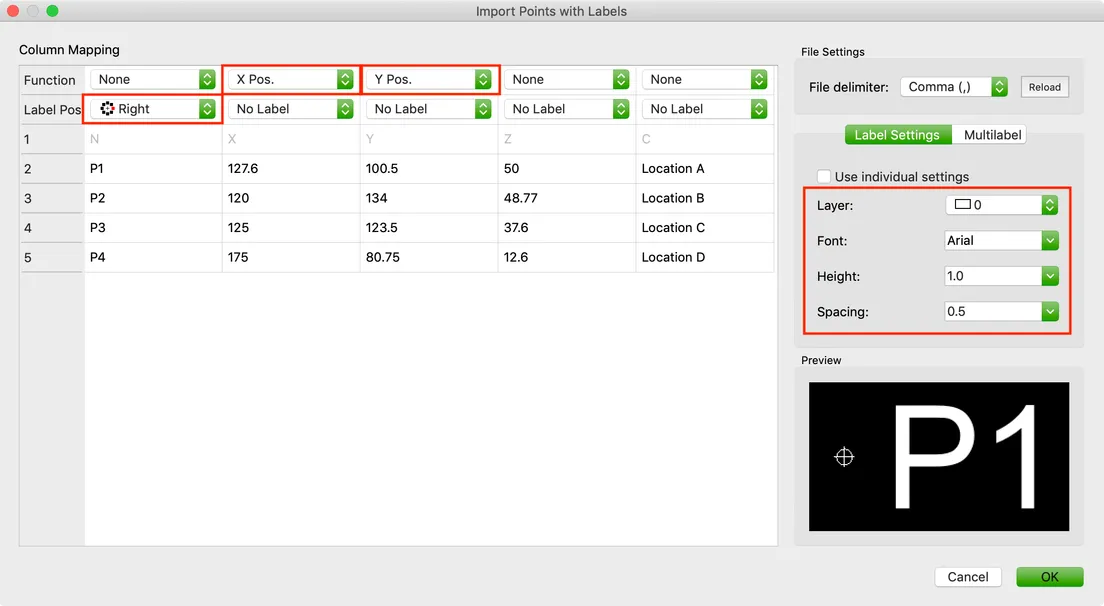
Next, a dialog is shown which lets you configure how exactly points and their labels should be rendered and formatted. You also need to tell QCAD which columns contain the coordinates of the point.
For this example, we only have to adjust or check three fields (the ones marked in red in the screenshot below):
- For the first column, we choose that these values are to be displayed as labels to the right of the point (Label Pos: “Right”).
- For the second column, we choose the function “X Pos.” as this column contains the X coordinate values of the points.
- For the third column we choose the function “Y Pos.”. QCAD tries to detect the X and Y columns automatically, based on the column header names.
Note:
- The fourth and fifth columns with the Z coordinate and the comment are ignored for this example (no function and no label).
- At the right side under “Label Settings”, we can adjust the font (“Arial”), the font size (here 1 drawing unit) and the spacing between the point and the text (here 0.5 drawing units). We can also choose which layer the labels are to be placed on.
- In the bottom right corner, we can see a preview of the first data point as it will be imported into the drawing.
Click OK to import all points of the CSV file with their labels.
Example 2: Point with Three Labels
Section titled “Example 2: Point with Three Labels”This example shows how multiple labels can be arranged around the imported points.
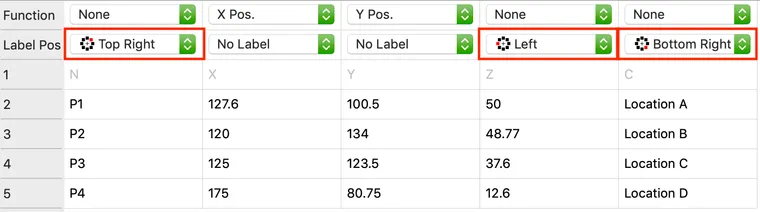
For this example, we want to show the Z coordinate of the points at the left of the point and the name and comment at the right, below each other:
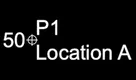
We can achieve this configuration by setting the label positions as follows:
Example 3: Displaying Coordinates as Labels
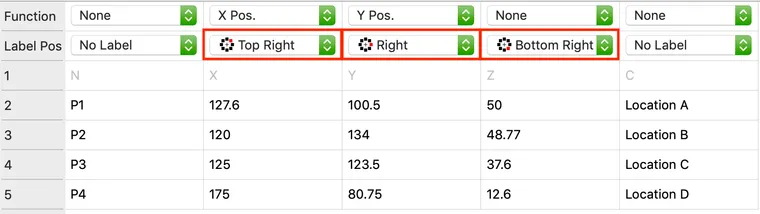
Section titled “Example 3: Displaying Coordinates as Labels”A column can be used as a coordinate as well as a label. In this example, we display the X, Y and Z coordinates at the right of the point, below each other:
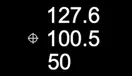
Note that we did not assign the function for the Z position, so the point is still placed at X/Y with Z set to 0.0.
Example 4: Multilabels with Separators
Section titled “Example 4: Multilabels with Separators”It’s also possible to assign multiple columns to the same label position. In this case, QCAD concatenates all values and displays them at the desired location. Here we show the name and the Z coordinate at the same label position (“Right”):
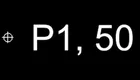
We can achieve this by simply assigning the same label position to multiple columns.
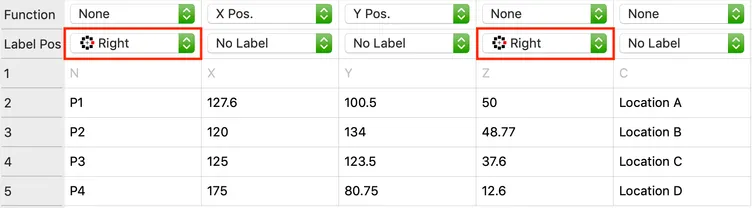
You can assign as many columns as desired to the same label position. Labels are concatenated by a comma and a space by default.
The separators used for the various label positions can be adjusted under the Multilabel tab:
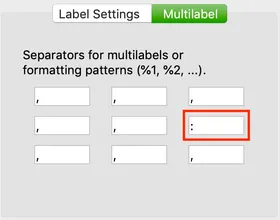
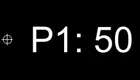
We can for example change the default separator for the label position at the right with a colon followed by a space (“: “), leading to a label formatting as shown here:
Example 5: Multilabels with Formatting Pattern
Section titled “Example 5: Multilabels with Formatting Pattern”It’s also possible to format labels in more advanced ways. To do this, you can enter a formatting pattern in the separator input fields. “%1” is then replaced by the first value of the multilabel, “%2” with the second value, etc. In this example, we use the formatting pattern “%2 (%1)”:
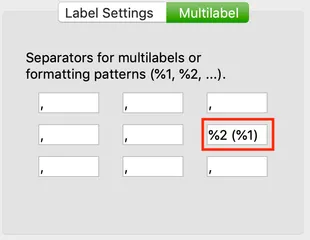
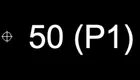
Note that in this case, the second value (Z) is displayed first, followed by the first value in brackets:
Z Coordinates
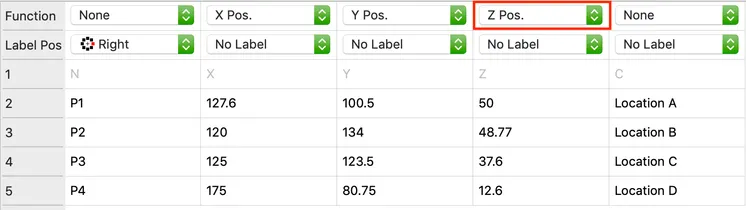
Section titled “Z Coordinates”Even though QCAD is a 2D CAD application, you can import Z coordinates for points. These Z coordinates can be displayed by the property editor in QCAD and will also be saved to DXF/DWG. To do this, simply assign the function “Z Pos.” for the appropriate column:
Labels with Individual Settings
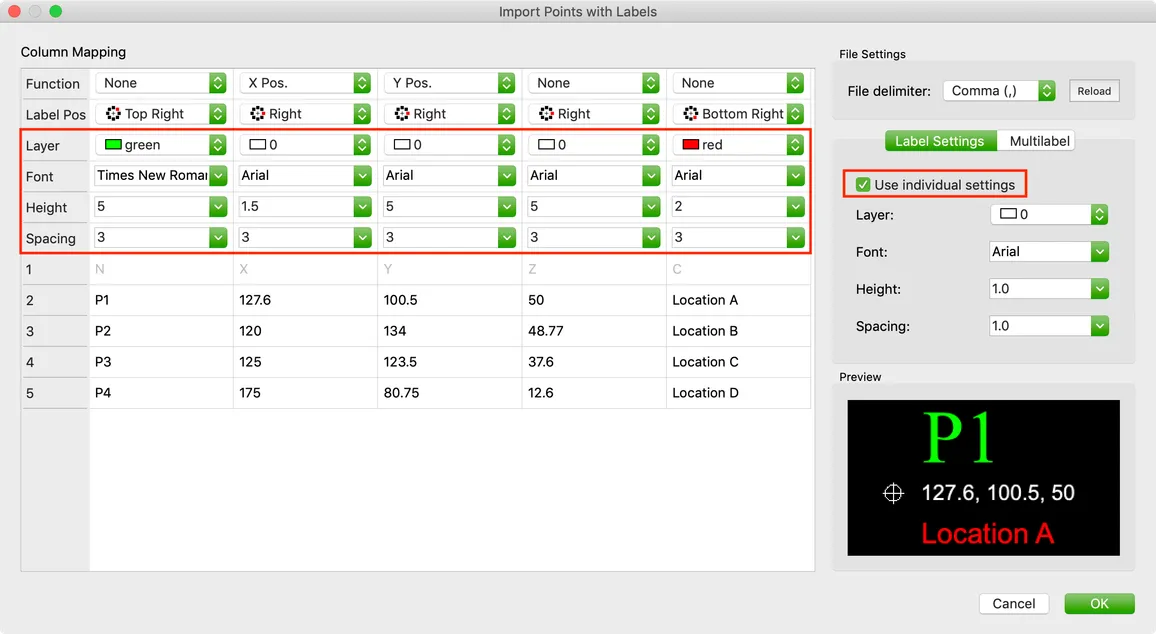
Section titled “Labels with Individual Settings”So far, we’ve used the same layer, font, text height and spacing for all labels. It’s also possible to control these aspects for each label position individually. To do this, check the option “Use individual settings” under “Label Settings”.
If this option is enabled, additional controls are displayed for each column. With these controls, we can define the layer, font, text height and spacing for each label position individually. This allows us to place different labels on different layers and use a different font for each label as shown in this example:
File Delimiters
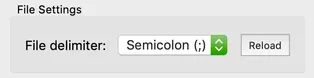
Section titled “File Delimiters”Fields in CSV files are typically separated by a comma. However, there are also CSV files which use a tab or a semicolon as delimiter. You can adjust the file delimiter in the dialog at the top right and reload the file if you are dealing with such a file: