

Printing
Dieser Inhalt ist noch nicht in deiner Sprache verfügbar.
Step 1: Before Printing
Section titled “Step 1: Before Printing”Drawing 1:1
Section titled “Drawing 1:1”Drawings are almost always drawn in real size (1:1) with a CAD system. If this is not the case for your drawing, you might want to correct this before proceeding. You can scale your drawing by any given factor using the Modify > Scale tool if necessary.
Drawing Borders, Text Labels, Dimensions
Section titled “Drawing Borders, Text Labels, Dimensions”If your drawing has a drawing border or header, scale the border or header instead of scaling your drawing. For example, if your drawing is to be printed with a scale of 1:5 (factor 0.2 or five times smaller than real size), scale your drawing border or drawing header with a factor of 5, i.e. insert it five times larger than you want it to print. The same scale should be applied to text labels and dimension properties (dimension arrows, labels, gaps, etc.).
Alternatively, you can use layout blocks and viewports to create a layout of your drawing border and drawing as described in Tutorial: Layout Blocks and Viewports.
Drawing Preferences
Section titled “Drawing Preferences”- Open the DXF/DWG file you want to print.
- Edit > Drawing Preferences (NOT Application Preferences)
- Check and adjust the drawing unit and paper unit under General > Drawing Unit:
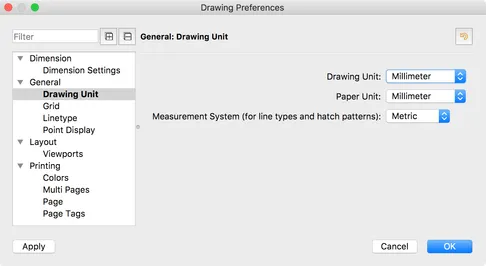
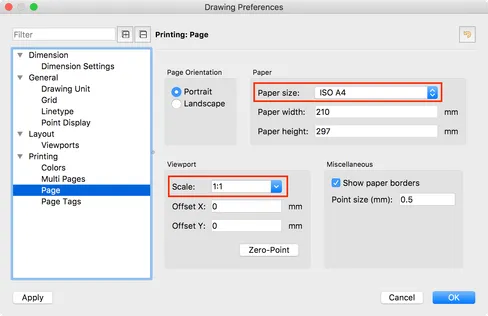
- Check and adjust Printing > Page > Paper Size and Scale (if known):
- Check and adjust Printing > Multi Pages > Glue Margins. These margins are used as overlap when printing to multiple pages but also influence the tools to automatically fit or center the drawing on paper:
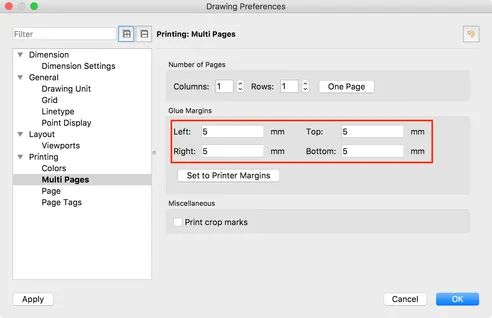
- In the same dialog page, you can also adjust the number of columns and rows to use when printing to multiple pages.
Step 2: Print Preview
Section titled “Step 2: Print Preview”Choose File > Print Preview to switch to the print preview mode.
Adjusting the Scale
Section titled “Adjusting the Scale”
- If the desired scale for printing is known (e.g. 1:2, 1:10, 2:1, 200:1, etc.), adjust the scale to the accurate, desired scale (2:1 in this example) [1]. If the desired scale of your drawing is not known or irrelevant, click the button to adjust the drawing scale to the chosen paper [3].
- Optionally, adjust the paper position using the tool Move Paper Position [2] or use the button to center the drawing on the chosen paper(s) [4].
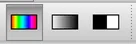
- To print in black / white or gray scale, click the appropriate icon in the options toolbar:
- Your drawing should be shown on a white paper as shown here:
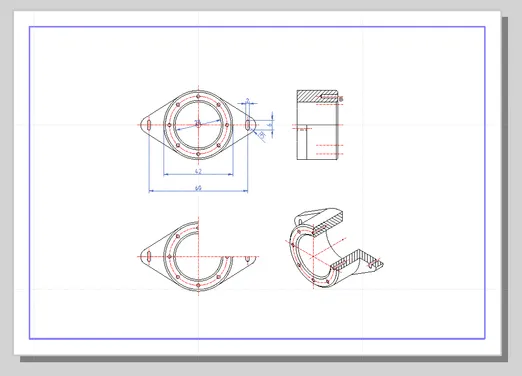
If your drawing is shown on a gray background, please check your paper and scaling settings again. If the purple rectangle crosses your drawing, please check the glue margins in the drawing preferences.
- If you have chosen to print to multiple pages, the pages are shown beside / below each other:
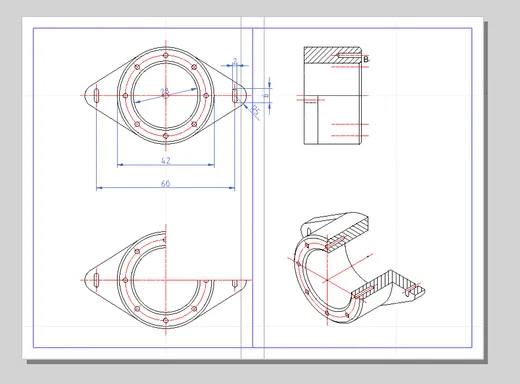
Step 3: Printing / PDF Export
Section titled “Step 3: Printing / PDF Export”Printing on Paper
Section titled “Printing on Paper”To print the drawing, choose File > Print.
PDF Export
Section titled “PDF Export”To export the drawing with the chosen layout to PDF, choose File > PDF Export.
Troubleshooting
Section titled “Troubleshooting”Thin or Invisible Lines
Section titled “Thin or Invisible Lines”If your print out is very light or fine (thin lines), you might want to adjust the widths of your entities. Line widths are usually controlled through layer properties. Select the layer which prints too fine, then choose Layer > Edit Layer and change the width to something thicker. Avoid line weight “Default” as this prints at the configured default line width (Edit > Application Preferences > Graphics View > Appearance > Linetypes and Lineweights > Default Lineweight) and might not be visible.
If the above does not solve the problem, please make sure that the hairline mode is not enabled for your drawing:
- Load your file
- Choose menu File > Print Preview
- Make sure that the button to toggle the hairline mode is not checked. In this example it is checked and needs to be unchecked (click the button to uncheck it):

Imprecise Scaling
Section titled “Imprecise Scaling”Printers are not 100% accurate and paper expands / contracts depending on temperature and humidity. You can calibrate your printer under Edit > Application Preferences > Printer Settings > Calibration. If for example your print is 2% too small in Y direction, set Factor Y to 1.02.